Setting up Zapier Integration
Turn conversations into Zapier actions in a few clicks, connect Granola to your existing workflows and set up your own custom automations to get things done.Zapier is only available for paid users, on our Desktop apps.
1
Set up Zapier from Granola settings
You can find our Integrations in your Settings, via your avatar in the bottom left. Here you’ll see Zapier as an integration: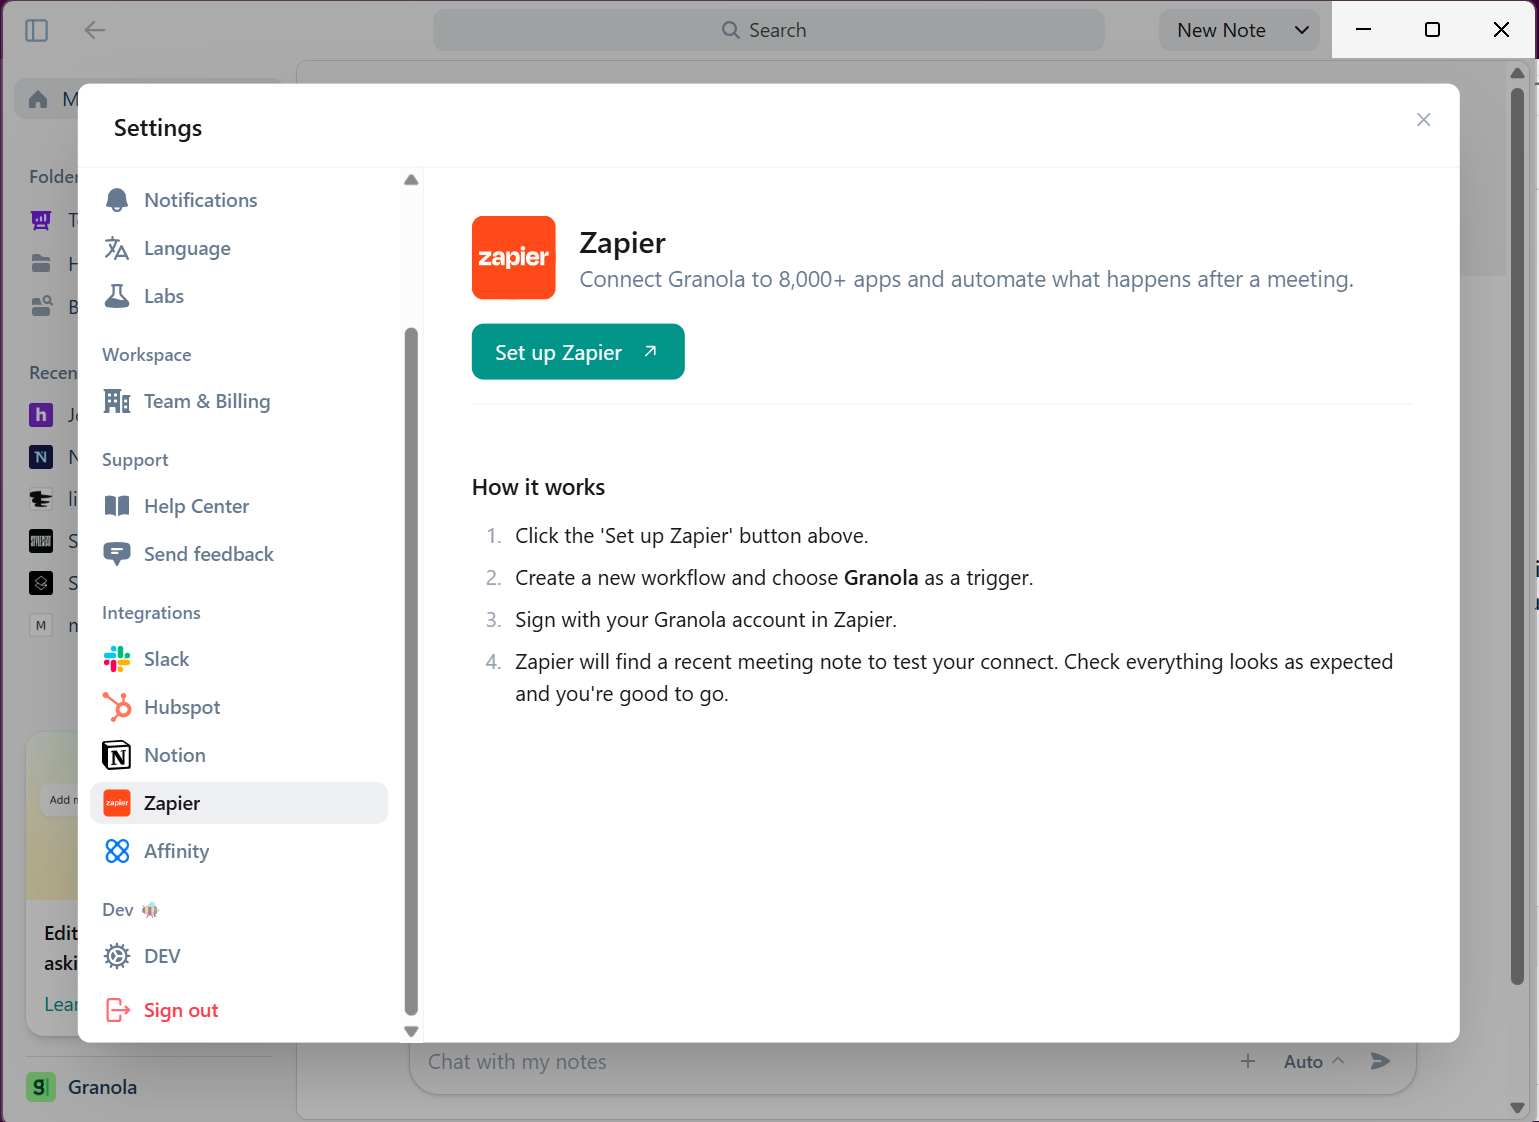
2
Search for Granola in Zapier
In Zapier, you’ll be prompted to set up a trigger event, where you can search for Granola to find our integration: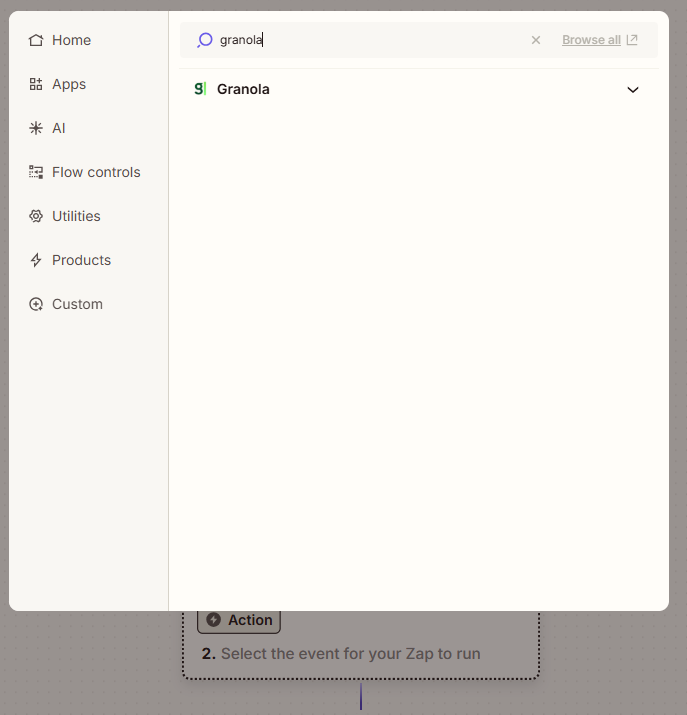
3
Choose your trigger event
Select which trigger you want to use: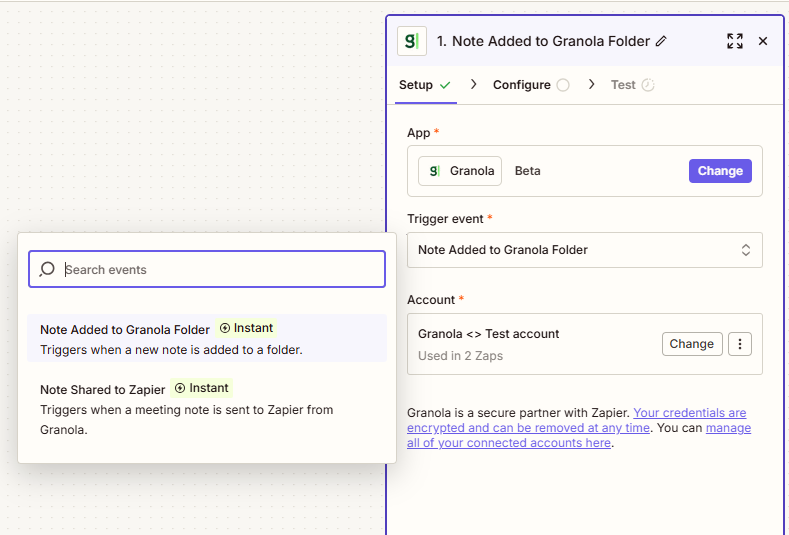
- Note Added to Granola Folder: Automatically triggers when a note is added to a specific folder
- Note Shared to Zapier: Triggers when you manually share a note to Zapier from the note sidebar
4
Configure your integration
Set up your integration details: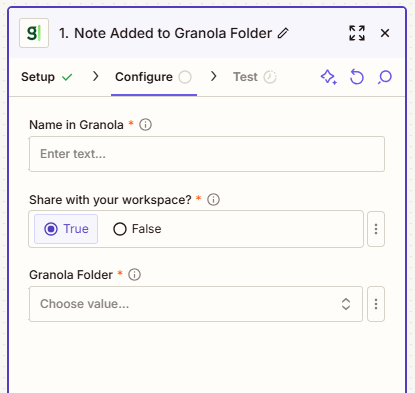
- Name in Granola: Give your integration a name, e.g. ‘Send actions to Linear’
- Share with your workspace: Choose whether your team can use this same Zap in Granola
- Granola Folder: Select which folder should trigger the automation (for folder triggers)
5
Test your integration
Zapier will find up to 3 recent test meetings for you to verify everything works correctly. Click on one to view the details: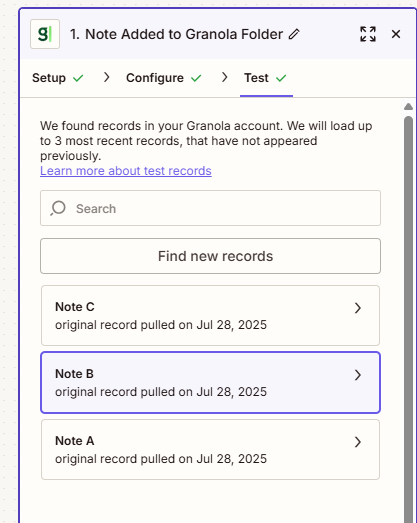
6
Add your action apps
Now add whatever other apps you want to connect after the Granola trigger. Popular examples include:
- Connecting with CRM systems (HubSpot, Salesforce, Attio) or ATS platforms (Greenhouse, BambooHR, Ashby)
- Sending messages via internal communications platforms (Slack, Microsoft Teams)
- Tracking actions (Asana, Trello, Monday, Linear)
- And thousands more from Zapier’s app directory
You’re all set
Once your Zapier integration is set up, you’ll see your Zap available in your note sidebar. Clicking this will trigger your Zap: